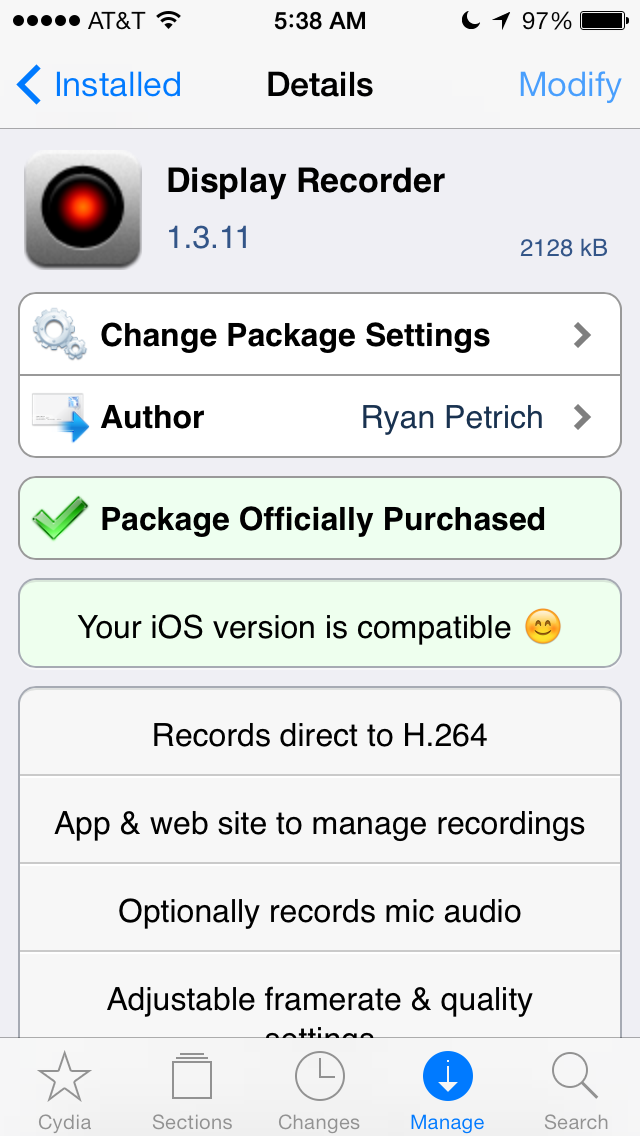
This application works great to capture your iPhone or iPad screen along with the iPhone’s microphone. Everything done on the screen is captured at an adjustable frame rate with the option for showing your finger taps. This app is really great for two reasons: it works really well and it has lots of features. Cost is $4.99. We’ll be using it more to demo apps for our reviews!
List of features:
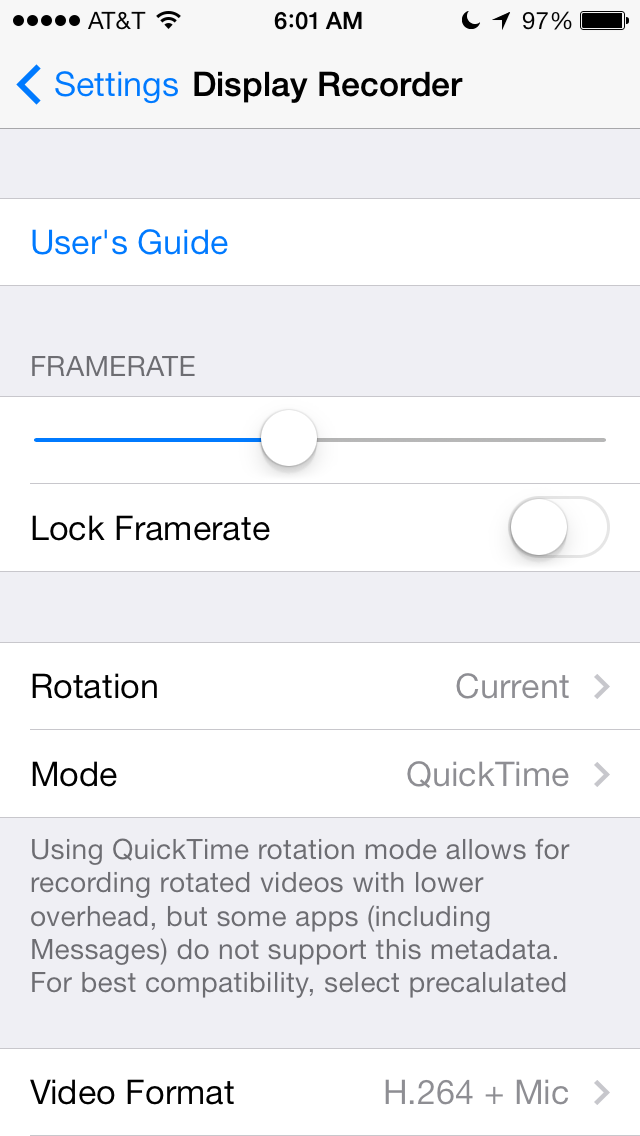
– Adjustable framerate
– Set rotation to Current Interface Orientation, Portrait, Upside Down, Landscape Left or Landscape Right
– Mode: QuickTime or Precalculated
– H.264/MOV with our without Mic Audio
– Video Quality Settings from 0.5 Mbps to 7Mbps
– Open GL Capture toggle
– Scale: Half or Full
– Show Taps: Always, When Recording or Hidden
– Tap Size: Large, Medium or Small
– Built in Web Server
– Start and stop recording via Activator
Screenshots


Videos
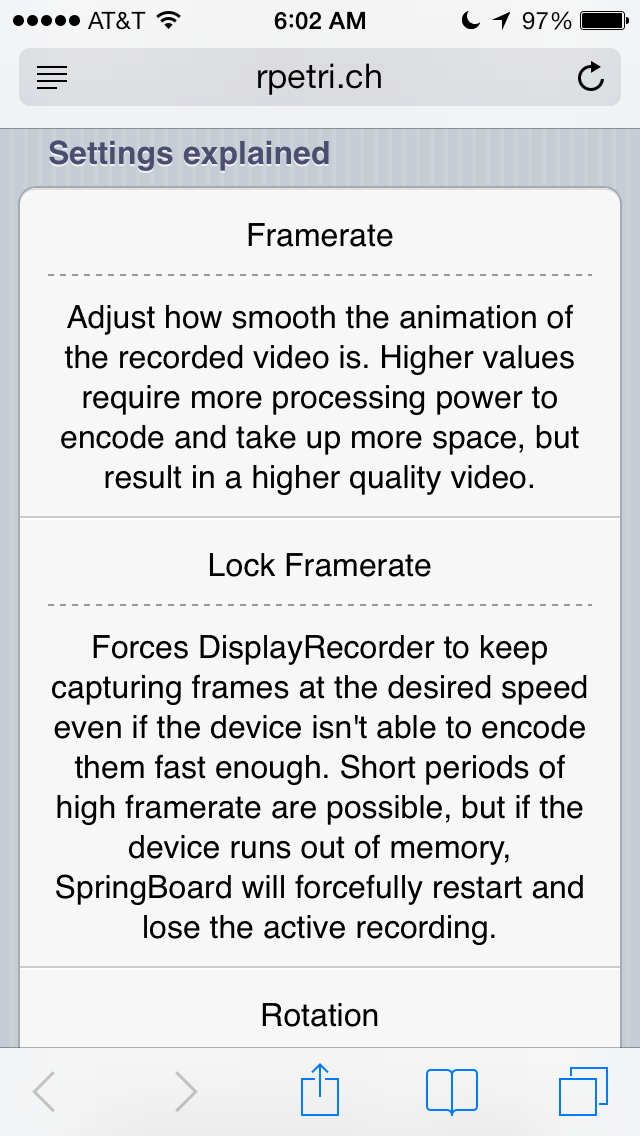
Settings Explained
via rpetri.ch
Creating a Recording
– Hold the sleep button for one second to start recording.
– The device will prompt you to ensure you haven’t pressed the button accidentally.
– Press Record and DisplayRecorder will begin recording exactly what’s on the display.
– Hold the sleep button to complete the recording.
Uploading a video to YouTube
– First make sure your YouTube username and password are set in Settings -> DisplayRecorder
– Launch the DisplayRecorder application from SpringBoard
– Tap the recording you wish to upload
– Enter a title and description. Both are required for all YouTube uploads
– Agree to the YouTube upload terms by pressing Upload
– Wait for the device to finish uploading the video–You can close DisplayRecorder and perform other tasks using your device, but it must not enter sleep mode or switch networks.
- When the upload is finished, a link to the video will be added to the pasteboard for easy sharing via email or twitter
Using the web interface
– The web interface can be used to extract recordings from the device for postprocessing or for accessing the live view
– Join your computer and iOS device to the same Wi-Fi network
– Launch DisplayRecorder via the SpringBoard
– If the bottom statusbar reads “Web server disabled”, tap the Enable button in the bottom left corner
– Enter the text in DisplayRecorder’s statusbar into your desktop browser’s address bar and press enter
– Use the on-screen interface to download videos or live view the device’s screen
Settings explained
– Framerate: Adjust how smooth the animation of the recorded video is. Higher values require more processing power to encode and take up more space, but result in a higher quality video.
– Lock Framerate: Forces DisplayRecorder to keep capturing frames at the desired speed even if the device isn’t able to encode them fast enough. Short periods of high framerate are possible, but if the device runs out of memory, SpringBoard will forcefully restart and lose the active recording.
- Rotation: Selects which orientation the video should be recorded at. Portrait is fastest on iPhone/iPod touch devices; Landscape Left is fastest on iPad
- Video Format: Selects the format DisplayRecorder should encode with. MJPEG/AVI can record all apps, even those that use hardware accelerated video and audio codecs. Yields very large files that must be played back on a computer. Incompatible with iOS 6.0
H.264/MOV cannot record apps that use hardware accelerated video and audio codecs. Yields much smaller files that may be played back on the device and transferred to the camera roll. H.264/MOV with Mic Audio behaves
similarly to H.264/MOV, but includes audio input gathered from the device’s microphone.
- Video Quality: Adjusts the quality of the recorded video. Low quality will reduce the size of the resulting videos, but no nearly as much as reducing the framerate. High Quality is recommended
– Grayscale: Captures the display in black and white. Reduces the size of the resulting video
- OpenGL Capture: Enables or disables capturing OpenGL content. OpenGL content includes games, hardware accelerated video and sometimes camera display. Disabling this option will improve the performance of the capture at the cost of not being able to capture certain content.
- Scale: Selects whether to capture the screen at half-size. Reduces the size of the resulting video drastically and is useful for getting high framerate captures on iPad. Not compatible with OpenGL capture
- Show Taps: Enables or disables on-screen preview of screen taps
- Tap Size: Adjust the size of the indicator used to represent taps
- Web Server: Enable or disable DisplayRecorder’s built-in web server. Using the web server you can download recordings, view a live preview of the display, and remotely control your device.
– Activation Methods: Choose how to start/stop recording the screen. Any Activator method can be assigned to DisplayRecorder
– YouTube Account: Login details for uploading YouTube videos. Note: saved login credentials are not encrypted.

 (2 votes, average: 4.50 out of 5)
hi, Where can i find it, i mean the App i couldn’t find it at appstore, so where can i get it?
I have and iPad and when ever I tipe in display recorder on the App Store it never comes up
It’s on Cydia
Where do I find it the App Store doesn’t show it
How can I copy the videos from my Phone to my Laptop? I have IFunBox but I can’t find the right location. My IOS is 9.3.1 Please help me ^^